Posted on

12 Essential RainPoint Smart Sprinkler Controller Facts Every Gardener Should Know

Gardener using a rainpoint smart sprinkler controller to monitor soil moisture in a vibrant garden.

Understanding the RainPoint Smart Sprinkler Controller

The RainPoint Smart Sprinkler Controller is revolutionizing modern gardening by making it easier to care for plants while conserving water. This advanced system combines technology with practical gardening needs, ensuring that gardeners can maintain lush landscapes without the constant worry of over- or under-watering. With features designed to monitor and adapt to plant needs, the rainpoint smart sprinkler controller is the perfect tool for anyone looking to enhance their gardening experience.

What is the RainPoint Smart Sprinkler Controller?

The RainPoint Smart Sprinkler Controller is an automated irrigation system that employs Wi-Fi technology and smartphone integration to optimize the watering process for gardens, lawns, and landscapes. This intelligent gadget allows users to create customized irrigation schedules based on specific plant types and local weather conditions, thereby ensuring optimal moisture levels without excess water usage.

Key Features of the RainPoint Smart Sprinkler Controller

  • Wi-Fi Connectivity: Connects seamlessly to your home Wi-Fi network for remote control and monitoring through a dedicated mobile app.
  • Soil Moisture Sensors: Provides real-time data on soil moisture levels to prevent over or under-watering.
  • Flexible Scheduling: Users can set specific watering times, durations, and frequencies tailored to their garden’s needs.
  • Weather Adaptation: Automatically adjusts watering schedules based on local weather forecasts to mitigate water wastage during rainy seasons.

How It Works to Optimize Water Usage

The RainPoint Smart Sprinkler Controller operates by leveraging advanced algorithms that consider several factors, including soil moisture, time of day, and seasonal variations. This ensures that water is applied only when necessary, significantly reducing water consumption. Moreover, users receive notifications about their watering schedules and can make adjustments on-the-go, promoting an efficient watering regime.

Benefits of Using the RainPoint Smart Sprinkler Controller

Integrating a smart sprinkler controller into your gardening routine offers numerous advantages, from saving time and resources to promoting healthy plant growth.

Water Efficiency and Cost Savings

With ongoing droughts and rising water costs, utilizing a smart sprinkler controller is more critical than ever. The RainPoint system helps to minimize water consumption by adjusting schedules based on weather conditions and soil moisture readings. This not only lowers utility bills but also contributes to water conservation efforts at a time when every drop counts.

Convenience and Time Management

Gardeners often face the challenge of balancing a busy lifestyle with the demands of maintaining their landscapes. The RainPoint Smart Sprinkler Controller alleviates this pressure by enabling users to set routines that water plants consistently without manual intervention. This “set it and forget it” approach frees up time for gardeners, allowing them to focus on other important tasks while their plants thrive.

Improving Plant Health and Growth

Providing the right amount of water at the ideal times can vastly improve plant health. The intelligence embedded in the RainPoint system ensures that plants receive tailored care, leading to better growth and vitality. As evidenced by numerous customer testimonials, those who have made the switch report increased blooming and healthier foliage, making their gardens more vibrant and alive.

Setting Up Your RainPoint Smart Sprinkler Controller

Getting started with the RainPoint Smart Sprinkler Controller is a straightforward process that can be accomplished in a few simple steps. Following this guide will ensure you maximize the benefits of your new system.

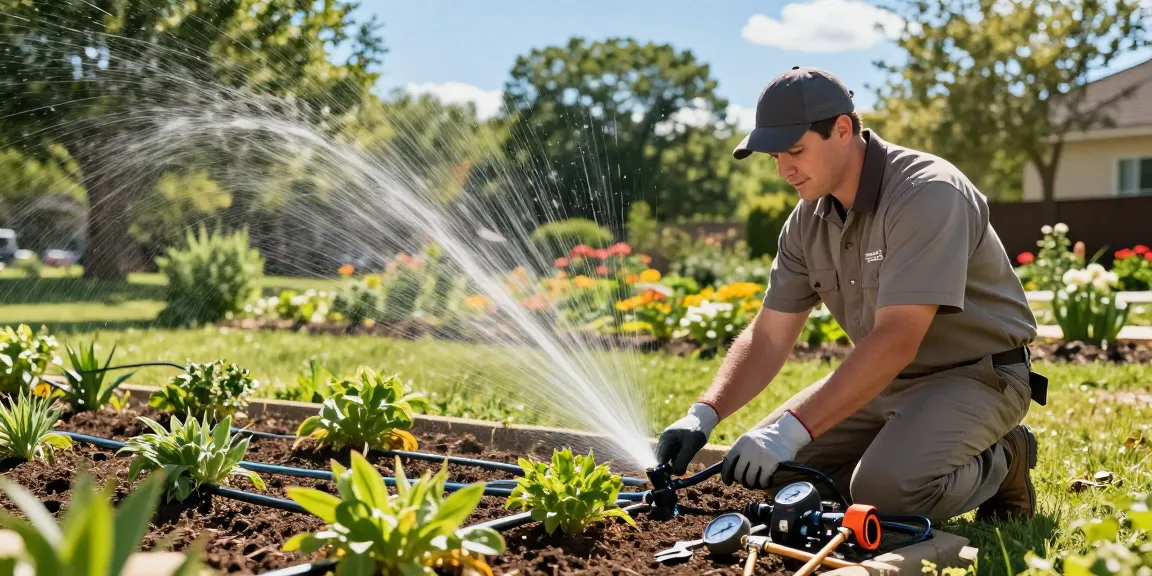
Installation Process: A Step-by-Step Guide

  1. Unboxing and Components Check: Start by carefully unboxing your RainPoint Smart Sprinkler Controller. Ensure all components are included, such as the main unit, soil sensors, and hoses.
  2. Placement: Decide on a strategic location for the controller where it will effectively manage your garden’s irrigation needs.
  3. Connect Hoses: Attach the hoses to the controller, making sure they are securely fastened to prevent leaks.
  4. Install Soil Sensors: For enhanced functionality, place the soil moisture sensors in designated areas to monitor water levels.

Connecting to Wi-Fi and Mobile App Integration

To fully harness the potential of your RainPoint Smart Sprinkler Controller, connect it to your home Wi-Fi network. This step typically involves:

  • Downloading the RainPoint app on your smartphone.
  • Following the app prompts to connect the sprinkler controller to your network.
  • Verifying the connection within the app to ensure smooth operation.

Configuring Watering Schedules Based on Plant Needs

Once your RainPoint system is set up and connected, it’s time to configure your watering schedules. Use the app’s intuitive interface to set:

  • The specific days and times you want watering to occur.
  • The duration for each watering session based on plant requirements.
  • Adjustments for seasonal changes, ensuring that your garden stays thriving year-round.

Common Issues and Troubleshooting Tips

While the RainPoint Smart Sprinkler Controller is designed for ease of use, users may occasionally encounter issues. Here are some common challenges and resolutions.

Wi-Fi Connectivity Challenges and Solutions

Connectivity issues can arise due to various reasons, including interference or incorrect network settings. If your sprinkler controller fails to connect, try the following:

  • Ensure your Wi-Fi network is functioning properly with a strong signal.
  • Restart your router and attempt to reconnect the controller.
  • Consult the troubleshooting section in the app for additional steps.

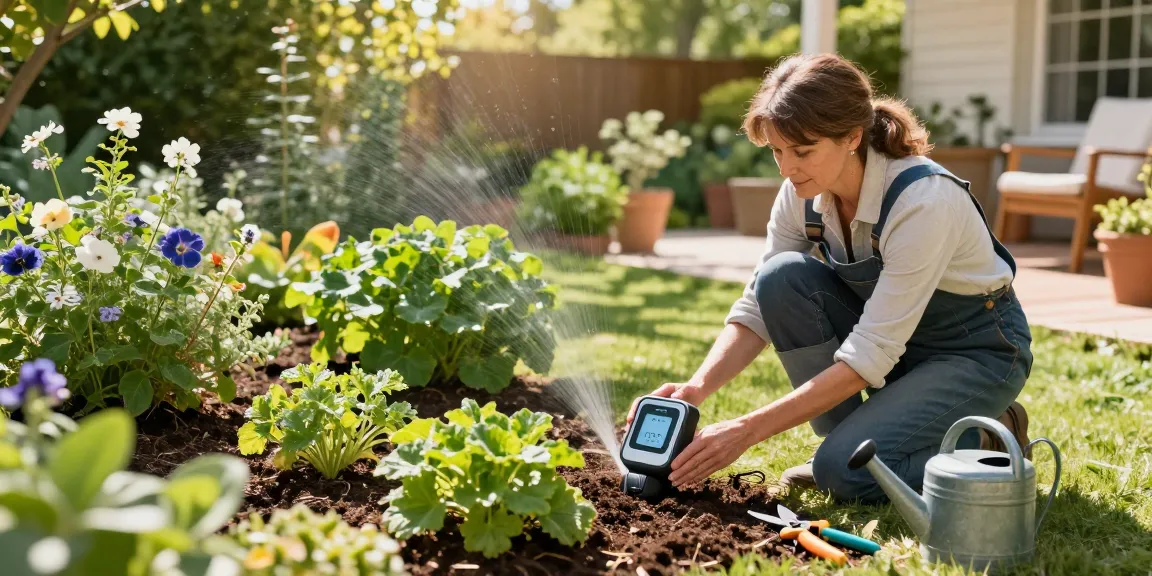
Understanding Sensor Data and Irrigation Adjustments

The moisture sensors provide valuable data that informs your watering schedules. If your plants are not thriving or appear overwatered, adjust the settings based on sensor readings. Similarly, if the soil remains dry, consider increasing the irrigation frequency.

Maintenance Tips for Long-Lasting Performance

To keep your RainPoint system operating efficiently, regular maintenance is essential. Here are a few tips:

  • Clean the filters and hoses periodically to prevent clogging.
  • Check battery levels in wireless components and replace them as needed.
  • Inspect the system at the beginning of each season to ensure everything is functioning correctly.

The Future of Smart Gardening Technology

As technology continues to evolve, the future of smart gardening looks promising. Innovations in irrigation systems are expected to become even more sophisticated, enabling gardeners to manage their resources better than ever.

Innovations in Smart Irrigation Systems by 2026

By 2026, technological advancements will likely introduce features such as:

  • Increased integration with artificial intelligence to analyze plant health and optimize watering schedules.
  • Advanced weather prediction algorithms that provide even more precise watering adaptations.
  • Greater compatibility with home automation systems for seamless integration with smart homes.

How Smart Controllers Are Shaping Sustainable Gardening

The rise of smart controllers like the RainPoint system signifies a shift towards sustainable gardening practices. These technologies promote responsible water usage, aiding in conservation efforts while allowing gardeners to maintain the beauty and health of their landscapes.

Trends in Home Gardening Technology and Automation

Home gardening technology is seeing a rise in automation, empowering individuals to cultivate thriving gardens without the traditional challenges. Smart irrigation systems, alongside hydroponics and vertical gardening innovations, represent the future of sustainable home gardening.

What makes the RainPoint smart sprinkler controller unique?

Its combination of user-friendly technology, detailed moisture monitoring, and flexible scheduling sets it apart from traditional irrigation systems, making it an essential tool for modern gardeners.

How can I troubleshoot Wi-Fi connection issues?

If connectivity issues arise, first verify the strength of your Wi-Fi signal. Restarting your router and re-adding the controller via the app can often resolve these issues.

What are the best practices for setting up a watering schedule?

Consider your plants’ specific needs, local weather conditions, and seasonal changes when configuring your watering schedule to ensure optimal growth and resource efficiency.

What should I do if my plants are not thriving?

Evaluate the moisture levels using your RainPoint sensors, adjust watering schedules accordingly, and consider factors like sunlight and soil quality.

How does the RainPoint system compare to traditional timers?

Unlike traditional timers, the RainPoint system offers real-time data, weather adaptation, and remote control, providing a more efficient and user-friendly solution for modern gardeners.

Posted on

Certified Best Hose Nozzle Strategies for Home Gardeners

Using the best hose nozzle to water vibrant flower beds and vegetable patch in a sunny backyard.

Understanding the Importance of Choosing the Best Hose Nozzle

Garden enthusiasts today understand that a well-watered garden can mean the difference between thriving plants and a wilting landscape. Among the various tools that aid in efficient watering, the hose nozzle stands out as an essential item. The right hose nozzle not only enables you to control the flow and distribution of water but also enhances the overall effectiveness of your irrigation system. Choosing the best hose nozzle can streamline your gardening efforts, reduce water waste, and promote healthier plant growth. When exploring options, best hose nozzle provides comprehensive insights into the many features today’s products offer.

What Makes a Hose Nozzle Essential for Your Garden?

A hose nozzle is a small yet powerful accessory that connects to your garden hose and allows you to modify the spray pattern and flow rate of water. This capability is crucial for several reasons:

  • Efficiency: A nozzle can help target water exactly where it is needed, reducing wastage.
  • Versatility: Different plants have different watering needs. With adjustable settings, you can cater to everything from delicate seedlings to established trees.
  • Convenience: Using a nozzle can eliminate the hassle of dealing with a fully open hose, making watering tasks less cumbersome.

Common Mistakes When Selecting a Hose Nozzle

Many gardeners commit common errors in selecting a hose nozzle, which can lead to frustration and inefficiency:

  • Overlooking Material Quality: Cheaper plastic nozzles may degrade quickly, leading to leaks and poor performance.
  • Ignoring Compatibility: Ensure your nozzle is compatible with your hose size and connection type.
  • Failing to Consider Spray Patterns: Without adjustable patterns, you may end up with a nozzle that doesn’t fit your specific watering needs.

The Benefits of Using the Best Hose Nozzle in 2026

As gardening technology advances, so do hose nozzles. The best hose nozzles available in 2026 offer enhanced features and benefits:

  • Water Conservation: New nozzles are designed to reduce water flow while maintaining efficacy, encouraging eco-friendly gardening practices.
  • Improved Ergonomics: Many models come with comfortable grips that reduce strain during prolonged use.
  • Advanced Technology: Some nozzles now include smart features that allow you to control them via a smartphone app, making it easier to manage your watering schedule.

Top Features of the Best Hose Nozzles

Adjustable Spray Patterns: Why They Matter

One of the most vital features to look for in a hose nozzle is adjustable spray patterns. This feature enables you to switch between various settings, such as:

  • Straight Stream: Ideal for reaching distant plants.
  • Fan Spray: Perfect for gentle watering of seedlings.
  • Soaker Setting: Great for saturating the soil slowly and evenly.

Offering this level of flexibility allows gardeners to optimize watering for various situations.

Materials and Durability: Choosing Wisely

The material of your hose nozzle can greatly affect its performance and lifespan. Look for:

  • Metal Nozzles: Often made of brass or aluminum, these nozzles tend to last longer and are less prone to cracking.
  • High-Quality Plastic: Some advanced plastics are designed to withstand outdoor conditions and can also offer lightweight convenience.

Choosing durable materials can save you money in the long run, eliminating the need for frequent replacements.

Comfort Features: Grip and Ease of Use

Comfort is critical, especially for those who spend considerable time watering their gardens. A nozzle with an ergonomic grip can:

  • Reduce hand fatigue during extended use.
  • Provide better control over the water flow and spray patterns.

Some models even feature thumb controls for easy adjustments without having to switch grips.

Comparing the Best Hose Nozzles Available in 2026

Review of the Top 5 Hose Nozzles This Year

The following nozzles have been identified as the best in 2026:

  1. Melnor R301 RelaxGrip: With eight spray patterns, this nozzle excels in versatility.
  2. Husky Pro Thumb Control: Praised for its one-touch feature, suitable for most watering tasks.
  3. Dramm 12380: Known for its full brass construction, it offers durability and reliability.
  4. Vortex Metal Rear Trigger: Users appreciate its robust build and multiple spray settings.
  5. Orbit Adjustable Nozzle: Features a rotating connection for easy maneuverability.

Customer Feedback: What Users Are Saying

Customer reviews play a significant role in determining the best products. Many users highlight the following points:

  • Ease of Use: Most nozzles are praised for their straightforward setup and functionality.
  • Performance: Many report improved watering efficacy thanks to adjustable features.
  • Durability: Customers appreciate nozzles that withstand weather conditions without deteriorating.

Price vs. Performance: Finding Value

While it might be tempting to opt for the cheapest option available, investing in a good hose nozzle often pays off in performance and longevity. Here are some considerations:

  • Evaluate the warranty provided—longer warranties often indicate confidence in the product’s durability.
  • Compare features rather than just the price; sometimes, a higher upfront cost can lead to savings through longevity and effectiveness.

How to Maintain Your Hose Nozzle for Longevity

Best Practices for Cleaning and Storing Hose Nozzles

Proper maintenance ensures your hose nozzle continues to perform effectively. Consider these tips:

  • Regular Cleaning: Remove any debris that may clog the nozzle. A simple rinse under water often suffices.
  • Seasonal Storage: If you live in a climate that experiences freezing temperatures, store your nozzle indoors during winter to prevent damage.

Common Issues and Troubleshooting Tips

Every gardener may experience problems with their hose nozzle from time to time. Here are some common issues and how to address them:

  • Low Water Pressure: Check for clogs in the nozzle or hose; cleaning can often remedy this.
  • Leaks: Ensure all connections are secure and that gaskets are intact.

Extending the Life of Your Garden Tools

To maximize the lifespan of your entire garden toolkit, including hose nozzles, consider the following:

  • Routine Inspections: Regularly inspect tools for wear and tear.
  • Proper Usage: Use tools as intended to reduce the likelihood of damage.

Future Trends in Gardening Tools and Accessories

Innovative Technologies in Hose Nozzles

The gardening industry is rapidly evolving. Here are some trends to watch out for in hose nozzle technology:

  • Smart Technology: Many new nozzles feature connectivity that allows gardeners to monitor and control watering schedules.
  • Customizable Spray Patterns: Innovations allow users to program specific watering needs for different plants via an app.

Eco-Friendly Options: Sustainability in Garden Care

Sustainability is becoming increasingly important in gardening. Look for nozzles that:

  • Use less water while providing adequate coverage.
  • Are made from recycled materials.

Predictions for Gardening Tools in 2027 and Beyond

As we look ahead, gardening tools are likely to become even more sophisticated. Expect trends such as:

  • Increased integration with smart home systems for automated gardening.
  • More focus on tools that conserve natural resources and promote healthy ecosystems.

What is the best hose nozzle for my garden?

Choosing the best hose nozzle for your garden depends on your specific needs, such as the plants you’re watering, the size of your garden, and your water conservation goals. Assessing various features and customer reviews can guide your decision.

How do I choose a hose nozzle for watering plants?

Consider the types of plants in your garden. A nozzle with multiple spray settings will allow you to cater to both delicate seedlings and robust shrubs, ensuring that each plant receives the right amount of water.

Can the best hose nozzle help save water?

Yes, a high-quality hose nozzle designed for efficiency can significantly reduce water waste. Features like adjustable flow rates and targeted spray patterns ensure water is used effectively.

What features should I look for in a hose nozzle?

Key features to look for include adjustable spray patterns, ergonomic grips, durability, and ease of use. These factors play essential roles in your watering experience.

How often should I replace my hose nozzle?

With proper maintenance, a good hose nozzle can last several years. However, inspect it regularly for wear and consider replacing it if you notice significant damage or diminished performance.

Posted on

Professional Irrigation Services in Hudson oaks, TX Case Study: Proven Landscape Efficiency Results

Professional Irrigation Services in Hudson oaks, TX technician repairing a sprinkler system in vibrant garden.

Understanding the Need for Professional Irrigation Services

In the vibrant climate of Hudson Oaks, TX, maintaining a healthy landscape requires an effective irrigation system. As homeowners invest in their gardens and lawns, understanding the significance of professional irrigation services like those offered by Professional Irrigation Services in Hudson oaks , TX becomes paramount. These services ensure that watering systems operate at optimal efficiency, preserve water resources, and foster lush plant growth, all while saving homeowners money on utility bills.

Why Efficient Irrigation Matters in Hudson Oaks

Efficient irrigation is crucial in Hudson Oaks, where the demand for water can fluctuate due to weather conditions. Proper irrigation management aids in conserving water while ensuring that plants receive the right amount of moisture. With the right techniques and equipment, homeowners can avoid overwatering, which not only wastes water but can also lead to root rot and other plant diseases.

Common Irrigation Issues Faced by Homeowners

Many homeowners in Hudson Oaks encounter various challenges with their irrigation systems, including:

  • Leaky pipes leading to water waste
  • Malfunctioning sprinkler heads resulting in uneven coverage
  • Clogged drip lines causing inefficient water distribution
  • Improperly programmed irrigation controllers
  • Seasonal maintenance neglect leading to system failures

Benefits of Professional Irrigation Services

Investing in professional irrigation services offers numerous advantages, such as:

  • Expert diagnosis: Trained professionals can quickly identify the cause of irrigation issues and provide effective solutions.
  • System efficiency: Regular maintenance can enhance the efficiency of irrigation systems, ensuring proper water use.
  • Cost savings: By reducing water waste, homeowners can enjoy lower utility bills.
  • Increased property value: A well-maintained landscape adds value to properties in Hudson Oaks.
  • Sustainability: Professional services often incorporate environmentally-friendly practices tailored to local conditions.

Innovative Solutions for Water Conservation

Advanced Drip Irrigation Systems Explained

Drip irrigation is one of the most efficient methods of delivering water directly to a plant’s root zone, minimizing waste by reducing evaporation and runoff. This system is particularly advantageous in regions like Hudson Oaks, where water resources must be managed judiciously. By converting traditional irrigation setups to advanced drip systems, homeowners can significantly enhance their water conservation efforts.

Implementing Water-Saving Technologies

The integration of smart irrigation controllers and moisture sensors can revolutionize how homeowners manage their watering schedules. These technologies automatically adjust watering frequency and duration based on soil moisture levels and weather conditions, ensuring that landscapes receive exactly what they need without excess.

Cost-Effectiveness of Efficient Irrigation Solutions

While the initial investment in advanced irrigation systems may seem significant, the long-term savings often outweigh the upfront costs. Homeowners can expect reduced water bills, fewer instances of plant diseases due to overwatering, and lower maintenance costs associated with well-maintained irrigation systems.

Key Irrigation System Repairs and Maintenance

Identifying Leaks and Broken Pipes

One of the most common issues homeowners face is detecting leaks or broken pipes. These problems not only waste water but can also lead to more costly damage if left unaddressed. Regular inspections and quick repairs are essential to maintaining system integrity and efficiency.

Importance of Regular Maintenance Services

Just like any mechanical system, irrigation systems require regular maintenance to function correctly. Seasonal tune-ups, inspections, and component replacements can significantly extend the lifespan of your investment, ensuring that your landscape remains healthy and vibrant.

Best Practices for Sprinkler System Repairs

Repairing sprinkler systems involves more than just replacing broken parts. It is essential to consider factors such as:

  • Adjusting spray patterns to avoid overspray on sidewalks and driveways
  • Rerouting heads to cover all areas of the landscape
  • Regular testing of the system to check for proper operation and adjustments

Installation of New Irrigation Systems

Factors to Consider for New Installations

When planning a new irrigation system installation, several factors should be considered:

  • Size and layout of the landscape
  • Type of plants and their specific watering needs
  • Soil type and drainage characteristics
  • Availability of water sources and pressure considerations

Customizing Irrigation Systems for Your Landscape

Every landscape is unique, requiring tailored solutions to achieve optimal efficiency. A professional irrigation service can design a system that meets specific requirements, ensuring that each plant receives adequate water while minimizing waste.

How to Expand Existing Irrigation Systems

As landscapes grow or change, it may be necessary to expand existing irrigation systems. This can involve adding new sprinkler heads, creating additional zones, or integrating new technology. Planning for expansion can save time and money in the long run, ensuring that your irrigation system adapts to your needs.

Future of Irrigation Services in Hudson Oaks

Emerging Trends and Technologies for 2026

As we look to the future, the landscape of irrigation services is evolving. New technologies such as automated systems and drought-resistant landscaping are becoming increasingly popular. These advancements not only aid in environmental sustainability but also streamline the irrigation process for homeowners.

How Climate Change Affects Irrigation Practices

With changing climate patterns, homeowners in Hudson Oaks must adapt their irrigation practices to ensure efficiency. This may involve adjusting watering schedules or implementing more sustainable practices that conserve water and protect plant health.

Preparing for Sustainable Water Management Practices

As awareness of environmental issues grows, sustainable water management practices are becoming a priority. Homeowners should be proactive in educating themselves about the importance of water conservation and adopting practices that promote efficient irrigation and healthy landscaping.

What is the average cost of irrigation repair?

The average cost of irrigation repair typically ranges from $55 to $120 per hour, depending on the complexity of the job and the experience of the technicians. Homeowners should consider these costs when budgeting for repairs and maintenance services.

How often should I service my irrigation system?

It’s recommended to service your irrigation system at least once a year, ideally before the growing season. This maintenance ensures that all components are functioning correctly and can prevent larger issues from arising.

What are the benefits of drip irrigation?

Drip irrigation offers numerous benefits, including:

  • Minimized water waste through targeted application
  • Reduced weed growth due to lesser water distribution
  • More efficient nutrient delivery directly to the roots
  • Lower maintenance costs due to fewer moving parts

How do I know when to replace my sprinkler heads?

Signs that it may be time to replace sprinkler heads include:

  • Inefficient water distribution patterns
  • Visible damage to the heads
  • Frequent clogging that cannot be cleared
  • Age of the sprinkler heads, typically over 10 years

What are the signs of an irrigation system leak?

Leaks can be identified by several indicators:

  • Wet spots on the lawn or landscape
  • Unusually high water bills
  • Loss of pressure in the system
  • Water pooling in certain areas
Posted on

How to Elevate Your Residential Painting Company Nashville Skills for Exceptional Home Transformations in 2026

Residential painting company Nashville team revitalizing home exterior with eco-friendly paint during sunset.

Understanding the Residential Painting Landscape in Nashville

The residential painting market in Nashville, TN, has witnessed significant transformations in recent years, influenced by evolving consumer preferences, environmental considerations, and advancements in painting technologies. Homeowners are now more discerning, demanding not only aesthetic appeal but also durability and eco-friendliness in their painting projects. When exploring options, Residential painting company Nashville provides comprehensive insights into these changing dynamics, offering services that align with contemporary needs and expectations.

Current Trends in Residential Painting Services

As of 2026, trends in residential painting services in Nashville reflect a greater emphasis on sustainability and personalization. Homeowners are increasingly opting for low-VOC and eco-friendly paints, which contribute to healthier indoor air quality without compromising on color vibrancy or finish quality. Furthermore, the rise of smart home technology has also impacted painting decisions, with homeowners seeking ways to integrate color schemes that complement their smart home devices and aesthetics.

Key Competitors and Market Positioning

The competitive landscape in Nashville is varied, with several companies vying for prominence in both residential and commercial painting. Companies like Harpeth Painting and CertaPro Painters have established reputations, but new entrants that focus on innovative practices and superior customer service are gaining traction. The key for any residential painting company in Nashville is to differentiate through service quality, specialized offerings such as color consultations, and a transparent approach to pricing and project execution.

Understanding Customer Needs and Preferences

Today’s consumers are more informed and proactive in their approach to home improvement. Customers prioritize not only the final aesthetic but also the overall experience of working with painters. This entails clear communication throughout the project, responsiveness to inquiries, and a clean, respectful work environment. Moreover, Nashville homeowners increasingly prefer providers who offer warranties, such as the three-year workmanship guarantee commonly found in local painting companies.

Choosing the Right Techniques and Materials

Selecting appropriate techniques and materials is critical for ensuring that painting projects meet both aesthetic and functional requirements. With a plethora of options available, homeowners should be informed about what constitutes quality in their choices.

Importance of Eco-Friendly Painting Solutions

Utilizing eco-friendly paint solutions is not just a temporary trend but a lasting movement within the Nashville painting landscape. As health and environmental concerns grow, many homeowners are seeking options that limit their exposure to harmful chemicals. Low-VOC paints, for example, are less toxic and contribute to improved indoor air quality. Choosing paints that meet EPA standards not only ensures safety but also enhances the longevity of the finish, resulting in longer intervals between repainting.

Preparing Surfaces for a Flawless Finish

A flawless painting project starts with careful surface preparation. This step is often overlooked, yet it is crucial for achieving a professional appearance and ensuring that the paint adheres properly. This includes repairing cracks, sanding surfaces, and applying primer where necessary to create a uniform base. Professional painters in Nashville prioritize comprehensive prep work, which sets the stage for dazzling results.

Color Selection: Trends and Tips for Homeowners

Color selection remains one of the most exciting aspects of the painting process for homeowners. Current trends favor earthy tones and soft neutrals that evoke calm and comfort, aligning with the growing aesthetic of creating serene, inviting spaces. Additionally, homeowners should consider the role of light in their color choices; understanding how natural and artificial light affects paint color can lead to better decision-making. Consultation with knowledgeable painting professionals can help navigate these choices effectively.

Building an Efficient Workflow for Painting Projects

A well-organized workflow is essential for the timely and successful completion of painting projects. Implementing strategic steps from budgeting to project execution can greatly enhance efficiency and client satisfaction.

Pre-Painting Preparation Steps

Before the paintbrush hits the wall, meticulous planning and preparation must occur. This includes a detailed consultation that outlines the project scope, material choices, and timeline. It’s vital to establish clear expectations with the homeowner to ensure a smooth project flow. In Nashville, companies often present visual aids or color samples during consultations to help clients visualize the final outcome.

Effective Time Management During Projects

Time management is paramount in maintaining project momentum and adhering to schedules. Professional painters in Nashville maximize productivity through careful planning of each phase, ensuring their teams have all materials and tools on hand before starting work. This reduces downtime and contributes to a smoother, faster workflow, allowing for timely project completion.

Post-Painting Cleanup and Customer Follow-Up

Once the final coat of paint has been applied, the importance of thorough cleanup cannot be overstated. A professional painting company will always leave the space tidy, removing any debris, drips, or spills. Furthermore, establishing a follow-up process enables companies to address any potential customer concerns and reinforces their commitment to satisfaction.

Enhancing Customer Experience and Communication

In a competitive market, the customer experience can be a powerful differentiator. Painting companies must employ effective strategies to cultivate trust and satisfaction among clients.

Establishing Trust Through Transparency

Transparent communication fosters trust between painting contractors and homeowners. This includes providing detailed estimates that cover all aspects of the project, from materials to labor. A reputable residential painting company will openly discuss potential challenges and their intended solutions, creating a sense of partnership with the client.

Utilizing Technology for Simplified Communication

Today’s technological advancements facilitate smoother communication lines between clients and contractors. Using applications or platforms for project management can allow clients to track progress, receive updates, and communicate directly with their painting team. This immediate access to information enhances customer satisfaction and engagement throughout the painting process.

Best Practices for Client Feedback and Testimonials

Encouraging client feedback is essential for continuous improvement and credibility. Companies should actively seek reviews and testimonials after completing projects, as these can significantly influence potential clients’ decisions. Establishing a structured approach for collecting feedback helps painters refine their services and respond to any identified issues proactively.

Future-Proofing Your Painting Business

As the painting industry evolves, businesses must adapt to stay relevant. Future-proofing encompasses embracing technological innovations, enhancing service offerings, and prioritizing sustainability.

Staying Ahead of Trends in Green Technology

Embracing green technology not only meets the current consumer demand but also positions painting businesses as leaders in sustainability. This could involve experimenting with new, environmentally friendly materials or employing methods that minimize waste. Staying updated on green innovations ensures that businesses can offer cutting-edge, responsible solutions to clients.

Incorporating Smart Solutions for Home Painting

Smart solutions are becoming increasingly popular in various home improvement sectors, including painting. Integrating digital tools that allow homeowners to visualize potential color schemes or finishes before applying them can enhance the client experience. Additionally, utilizing drones or advanced project management software can streamline operations, providing teams with real-time data to improve efficiency.

Predictions for the Nashville Painting Market in 2026

The Nashville painting market is poised for robust growth as more homeowners invest in aesthetic improvements. With a focus on sustainability, technological integration, and the demand for high-quality finishes, painting professionals will continue to refine their skills and offerings. Businesses that prioritize eco-friendly practices and exceptional customer service will likely lead the charge in this evolving landscape.

What are the average costs of residential painting in Nashville?

The costs of residential painting in Nashville can vary widely depending on the scope of work, with averages ranging from $2 to $6 per square foot for interior jobs. Factors influencing this pricing include the size of the home, the type of paint chosen, and labor costs.

How long does a typical interior painting job take?

Generally, smaller interior painting projects can be completed within 1-2 days, while larger jobs may take a week or more, especially if multiple rooms or extensive prep work is involved.

What should homeowners look for in a painting contractor?

Homeowners should seek contractors who provide comprehensive estimates, demonstrate experience and expertise, and offer warranties on their work. Customer reviews and references are also critical in assessing a contractor’s credibility.

Are eco-friendly paints as durable as traditional options?

Yes, advancements in eco-friendly paint technology mean that many low-VOC and natural paints are now as durable and long-lasting as traditional options, making them a viable choice for homeowners.

What warranties or guarantees should I expect from a painting company?

When hiring a painting contractor, it is essential to look for a warranty that covers workmanship, typically ranging from one to five years depending on the provider. This warranty offers peace of mind that issues resulting from labor will be addressed at no additional cost.

Posted on

Choosing the Right Roof Insulation Removal Company for Your Needs

Expert roof insulation removal company team safely cleaning insulation in an attic space.

Understanding Roof Insulation Removal Services

What is Roof Insulation Removal?

Roof insulation removal is a critical process that involves taking out existing insulation materials from the roof of a building. This process is essential when the insulation becomes damaged, contaminated, or is no longer effective. The removal can include various materials such as fiberglass, foam, or cellulose, often necessitating a complete assessment to determine the best approach for safe and efficient extraction.

Importance of Professional Services

Engaging a professional roof insulation removal company is vital for several reasons. First, professionals have the expertise to identify potential hazards, manage contamination risks, and mitigate issues related to mold or pests. They utilize specialized equipment and techniques to ensure that the removal process is safe, quick, and meets all regulatory standards. Attempting DIY removal can lead to health risks and may cause damage to the underlying structures, making pro services a worthwhile investment.

Common Reasons for Insulation Removal

There are numerous reasons homeowners may consider roof insulation removal. These include:

  • Moisture Damage: Periodic leaks can lead to moisture accumulation, resulting in mold growth and deteriorating insulation.
  • Infestation: Pests can invade insulation, and their droppings may contaminate the materials, necessitating removal.
  • Obsolescence: Older insulation materials may not meet modern energy standards, prompting upgrades.
  • Upgrades: Homeowners may wish to replace old insulation with more effective or environmentally friendly options.

Finding the Right Roof Insulation Removal Company

Key Qualities to Look For

When searching for a suitable roof insulation removal company, consider the following qualities:

  • Experience: Look for companies with extensive experience in insulation removal, as this often leads to better results.
  • Insurance and Licensing: Proper licensing and insurance protect both you and the technician from potential liabilities.
  • Transparent Pricing: A reliable company provides clear pricing structures without hidden fees.

Questions to Ask Before Hiring

Before making a decision, asking the right questions can pave the way for a successful partnership. Here are a few crucial inquiries:

  • What is your removal process, and how do you ensure safety?
  • Can you provide references or testimonials from previous clients?
  • Do you offer a warranty for your services?

Evaluating Company Reviews and Ratings

Online reviews and ratings can provide insights into a company’s reputation. Focus on platforms like Google, Yelp, or specialized home improvement sites. Look for consistent positive feedback regarding timeliness, professionalism, and quality of work. A company with a strong reputation is more likely to deliver satisfactory results.

The Roof Insulation Removal Process Explained

Step-by-Step Overview of Insulation Removal

The following is a general overview of the insulation removal process:

  1. Assessment: Professionals assess the current insulation condition and identify any health risks.
  2. Containment: The area is sealed to prevent dust or contaminants from spreading.
  3. Removal: The old insulation is carefully taken out using appropriate tools and techniques.
  4. Clean-Up: After removal, technicians clean the space and dispose of materials properly.
  5. Post-Assessment: They conduct a final inspection to ensure the area is safe for new insulation.

Tools and Techniques Used by Professionals

Professionals utilize various tools and techniques for insulation removal, including:

  • Vacuum Systems: Specialized vacuums designed for insulation help minimize dust and debris.
  • Cutting Tools: These facilitate efficient removal without damaging surrounding structures.
  • Protective Gear: Technicians wear protective clothing, masks, and goggles to ensure safety during the removal process.

Timeframes: How Long Should the Process Take?

The timeframe for roof insulation removal can vary based on several factors, including size, complexity, and condition of the insulation. Generally, a typical removal job may take anywhere from a few hours to a couple of days. Consulting with your chosen roof insulation removal company will provide a more accurate estimate based on your specific situation.

Costs Associated with Roof Insulation Removal

Factors Influencing Pricing

Understanding the cost involved in roof insulation removal helps in budgeting effectively. Key factors influencing pricing include:

  • Type of Insulation: Different materials have varying removal complexities and costs.
  • Area Size: Larger spaces generally incur higher costs due to increased labor and materials.
  • Health Hazards: If mold or pests are present, additional cleanup procedures may add to overall costs.

Budgeting for Insulation Removal

When budgeting for roof insulation removal, it’s essential to account for labor, disposal, and potential additional costs related to cleaning and repairs. Getting multiple quotes from different companies can provide a clearer picture of expected expenses and help you find the best value for your money.

Cost-Effective Alternatives

If the removal costs are high, consider alternatives such as:

  • Encapsulation: Sealing the existing insulation instead of removing it.
  • Upgrading Insulation: Adding new insulation over old material if it’s still in good condition.
  • Government Grants: Research any available grants for energy efficiency improvements that include insulation upgrades.

Post-Removal Considerations

Dealing with Residual Dust and Debris

After insulation removal, some dust and debris may linger in the area. It’s crucial to perform a thorough cleaning, which may include vacuuming the space with a HEPA filter and wiping down surfaces. Ensuring that dust and contaminants are adequately addressed is essential for maintaining air quality in the home.

When to Consider Replacement Insulation

Replacing insulation should be considered after removal if the previous material was damaged or substandard. Upgrading to newer, more energy-efficient options like spray foam or fiberglass can lead to better thermal performance and long-term energy savings. Consult with professionals to determine the best replacement based on your home’s needs.

Best Practices for Attic Maintenance

After insulation removal and replacement, implementing regular attic maintenance can enhance the lifespan of the new insulation. This includes ensuring proper ventilation to avoid moisture buildup, inspecting for leaks regularly, and conducting seasonal checks for pest activity. Keeping the attic clean and well-maintained can prevent future insulation issues and improve overall energy efficiency.

FAQs

1. How often should roof insulation be replaced?

It depends on the material, but typically, insulation should be inspected every 10-15 years for effectiveness and condition.

2. Can I remove insulation myself?

While possible, DIY removal can expose you to health risks. It’s best to hire professionals for safety and efficiency.

3. Is removing insulation messy?

Insulation removal can create debris and dust. Professionals use containment measures to minimize mess and ensure thorough cleanup.

4. What happens to old insulation?

Old insulation is typically disposed of according to local regulations, often going to specialized waste facilities or recycling programs.

5. How can I improve attic ventilation?

Improve attic ventilation by adding vents, using exhaust fans, and ensuring that insulation doesn’t block airflow pathways.

Posted on

How Stove & Cooktop Repair Can Change Your Appliance Maintenance Approach in 2026

Expert technician performing stove & cooktop repair in a well-lit kitchen.

Understanding Common Stove & Cooktop Problems

When it comes to culinary adventures, a functioning stove or cooktop is indispensable in the modern kitchen. However, problems with these appliances can arise unexpectedly, leading to frustration and interruptions in meal preparation. Common issues include burners that refuse to light, cracked cooktops, and persistent clicking sounds. Understanding these problems not only helps in troubleshooting but also in knowing when to seek professional help. At Wilson & Myers, we offer comprehensive Stove & Cooktop Repair solutions tailored to meet the needs of Denver residents.

Why Burners Won’t Ignite?

One of the most frustrating experiences is turning on a gas stove and finding that the burners won’t ignite. There are several possible reasons behind this issue:

  • Faulty Igniter: The igniter is responsible for creating the spark that ignites the gas. If it’s worn out or damaged, it may need replacement.
  • Clogged Burners: Food debris or grease can clog burner ports, preventing gas from flowing smoothly.
  • Gas Supply: Ensure that the gas supply is turned on. In some cases, a gas line may have issues that need professional attention.

What Causes Cracked Cooktops?

A cracked cooktop, particularly for glass or ceramic models, can be a significant concern. Cracks can occur due to:

  • Impact: Dropping heavy pots or pans can lead to cracks in the surface.
  • Thermal Shock: Sudden temperature changes, such as turning on a cold cooktop, can cause stress fractures.
  • Manufacturing Defects: In some cases, underlying defects in the material can result in cracks over time.

Identifying Clicking Noises in Gas Cooktops

Persistent clicking sounds from your gas cooktop can indicate issues that may require attention. Here are some key aspects to consider:

  • Stuck Ignition Switch: A malfunctioning switch could keep sending a spark even after the burner lights.
  • Moisture Presence: If water or spills reach the ignition system, it can create clicking noises.
  • Defective Wire Connections: Loose wires may cause irregularities in the ignition process leading to continuous clicking.

Essential Repairs for Diverse Cooktop Types

Different cooktop types come with unique repair requirements. Understanding these can aid in diagnosing issues more effectively.

Repairing Gas vs. Electric Models

Gas models often require the attention of a professional due to the complexities of handling gas connections. Common repairs for gas stoves include:

  • Replacing faulty igniters and valves
  • Realigning burners for optimal gas flow

On the other hand, electric stoves generally have issues related to heating elements and wiring, such as:

  • Replacing damaged heating coils or glass surfaces
  • Troubleshooting electrical connections to ensure consistent heating

Special Considerations for Induction Cooktops

Induction cooktops utilize electromagnetic energy to heat pots and pans. Problems may arise from:

  • Cookware Compatibility: Not all cookware works with induction cooktops. Using incompatible pans can prevent heating.
  • Power Supply Issues: Ensure that the cooktop is plugged correctly or that a circuit breaker isn’t tripped.

Addressing Issues with Glass-Ceramic Surfaces

Glass-ceramic cooktops enhance the aesthetic appeal of kitchens but are prone to unique issues. Repairs involve:

  • Replacing shattered or cracked surfaces with OEM materials
  • Cleaning and maintaining the surface to prevent future damage

DIY Troubleshooting Tips Before Calling a Professional

Homeowners can perform basic troubleshooting before enlisting professional help. Here are some steps to consider:

Simple Checks for Ignition Problems

To address ignition issues:

  • Inspect burner ports for blockages and clean them if necessary.
  • Check the igniter for signs of wear and ensure that gas supply is on.

How to Assess a Cracked Cooktop

For cracked cooktops, take the following steps:

  • Examine the crack to assess its size and depth.
  • Consider whether the cooktop is still usable, weighing the cost of repair versus replacement.

Steps to Eliminate Clicking Sounds

If you’re experiencing clicking sounds:

  • Ensure the area around the ignition switch is dry and free of moisture.
  • Check for any loose wires connected to the ignition system.

Choosing a Reliable Stove & Cooktop Repair Service

The choice of a repair service can significantly impact the outcome of your stove and cooktop repairs. Here’s what to look for:

What to Look for in a Repair Technician

Seek technicians with proper licensing and training specific to appliance repairs. Certifications from recognized organizations can also indicate competence.

How to Evaluate Customer Reviews and Ratings

Customer testimonials provide insights into the quality of service. Pay attention to recurring themes in reviews, such as promptness and quality of repairs.

The Importance of OEM Parts in Repairs

When getting repairs done, always ensure that the technician uses original equipment manufacturer (OEM) parts for durability and reliability. OEM parts often provide a better fit and performance compared to generic alternatives.

Frequently Asked Questions about Stove & Cooktop Repair

How much does it typically cost to repair a cooktop?

The national average repair price for an appliance repair service to fix a stovetop is generally between $100 and $400, depending on the nature of the problem and parts required.

Is it better to repair or replace a broken stove?

This decision often depends on the age and condition of your appliance. If repair costs are less than 50% of a new unit, it may be worth keeping the current stove.

What should I do if my stove won’t turn on at all?

Begin by checking the power supply and ensuring the appliance is properly plugged in. If everything looks good, you might need to inspect fuses or call a technician.

Are repairs covered by warranty?

Typically, appliance repairs performed by certified technicians using OEM parts come with warranties that guarantee the workmanship. Always inquire about warranty details.

How do I maintain my cooktop for longevity?

Regular cleaning, avoiding heavy impacts, and using appropriate cookware can increase the lifespan of your cooktop. Schedule professional inspections periodically to catch issues early.

Posted on

Innovative Enhancements for Cape Cod Homes: Expanding Space with Attached Garages

Enhance your vision of cape cod homes with a modern expansion featuring a landscaped yard and ocean views.

Understanding Cape Cod Homes

The essence of cape cod homes lies in their architectural charm and historical significance. Originating in the 17th century, these homes are a pioneer of the American architectural landscape. Building upon a foundation of practicality and integration with the natural environment, Cape Cod homes have evolved yet retained their timeless appeal. This section explores their historical roots, iconic features, and various styles that define this category of architecture.

Historical Significance of Cape Cod Homes

The emergence of Cape Cod homes can be traced back to the early settlers of the region, primarily from England, who sought to create residences that would withstand the unforgiving New England weather. These homes were designed for function over form, embodying qualities such as durability and minimalism. The steep roofs and symmetrical structures were pragmatic features to deal with snow accumulation and wind resistance.

Additionally, the geo-specific adaptations, such as the use of local materials like wood and stone, reflect a deep connection with the environment. As centuries progressed, the Cape Cod style became a symbol of New England culture and life, showcasing heritage while adapting to modern needs.

Architectural Features of Cape Cod Homes

Architecturally, Cape Cod homes are characterized by a few distinctive features that contribute to their unique aesthetic. The exterior commonly features:

  • Steeply Pitched Roofs: This slanted roof design is essential for shedding snow and rain, ensuring that the home remains structurally sound in harsh weather.
  • Dormer Windows: These windows are typically placed on the upper floors, allowing natural light into the home and creating more usable space.
  • Siding Materials: Most Cape Cod homes are clad in wooden clapboard or shingles, often painted in coastal colors that blend seamlessly with the oceanic landscape.
  • Symmetrical Facades: A signature of traditional Cape Cod homes, these symmetrical designs promote balance and tranquility.

Common Styles in Cape Cod Homes

Over time, various interpretations of the Cape Cod style have emerged. Some of the prominent styles include:

  • Classic Cape Cod: This style adheres closely to traditional features, such as relatively low ceilings and one or one-and-a-half stories.
  • Modern Cape Cod: Incorporating contemporary materials and embellishments, this style often features open floor plans and larger windows, enhancing light and connectivity with the outdoors.
  • Cape Cod Revival: Predominantly seen in the 20th century, these homes often incorporate Colonial Revival elements, such as elaborate doorways and porches.

Benefits of Expanding Cape Cod Homes

A common consideration for homeowners is optimizing their living space. An expansion can significantly enhance the functionality of cape cod homes, providing room for growing families or new ventures, such as home offices or hobby areas. But beyond mere practicality, expansions can profoundly impact a home’s overall aesthetic and value.

Increased Living Space and Functionality

One of the most significant benefits of expanding a Cape Cod home is the additional living space it creates. This added area can serve various purposes, such as transforming underutilized attic spaces into cozy bedrooms or integrating a home office into an extension that looks out onto the garden. Whatever the use, the added space can significantly improve the quality of life for residents.

Enhancing Curb Appeal with Strategic Design

Thoughtful design choices in expansions can enhance a home’s curb appeal. New entryways, porches, or even architectural details can either maintain or elevate the home’s traditional aesthetic. For instance, adding a wraparound porch can create an inviting atmosphere that blends perfectly with the home’s character.

Creating Multi-Functional Areas

Modern living often demands multi-functional spaces. Expanding a Cape Cod home allows the creation of versatile areas that can adapt to various needs over time. A room designed as an office today can easily transition into a guest bedroom tomorrow, reflecting the shifting requirements of a family.

Design Ideas for Attached Garages

When considering an expansion, the incorporation of an attached garage poses a practical solution that enhances convenience while contributing to the home’s overall design. A well-thought-out garage can boost a home’s functionality without sacrificing its aesthetic integrity.

Integrating Garage Designs with Home Aesthetics

Attached garages should not feel tacked on to the existing structure. Instead, they should resonate with the overall design language of the home. This can be achieved through materials and colors that match the exterior of the main residence, ensuring harmony in visual appearance.

Smart Storage Solutions for Cape Cod Spaces

With space often at a premium, ensuring that your garage design includes smart storage solutions is critical. Implementing built-in shelves, overhead storage, and designated areas for tools or outdoor gear can maximize organization and efficiency.

Eco-Friendly Garage Features

In today’s climate-conscious society, incorporating eco-friendly features in garage design is increasingly relevant. Options such as solar panels, energy-efficient insulation, and sustainable building materials can lessen the environmental footprint of your expansion while promoting long-term savings on utilities.

Planning Your Home Expansion

As exciting as the prospect of expansion can be, careful planning is crucial for ensuring a successful project. Understanding the necessary regulations, budgeting appropriately, and selecting the right contractors can mitigate common risks associated with home expansions.

Permits and Regulations for Home Expansions

Before embarking on an expansion, familiarize yourself with local building codes and zoning regulations. Many municipalities have specific requirements regarding the size, location, and appearance of home additions, especially in historic areas where Cape Cod homes are prevalent. Obtaining the necessary permits ensures that your project complies with local laws and avoids potential fines.

Budgeting for Your Project

Creating a pragmatic budget is critical to managing expectations and avoiding overspending. Start by estimating costs, including materials, labor, and permits. Consider setting aside a contingency fund for unexpected expenses, which will provide peace of mind throughout the project.

Choosing the Right Contractors

The selection of experienced contractors familiar with Cape Cod architecture can make a significant difference in the quality of your expansion. Look for professionals with a proven track record in managing similar projects, and don’t hesitate to request references or review previous work to gauge their ability and craftsmanship.

Maintaining Your Cape Cod Home Post-Expansion

Successfully completing a home expansion project is just the beginning; ongoing maintenance is essential to ensure the longevity and performance of your Cape Cod home. Regular upkeep and mindful preparations throughout the year can safeguard your investment.

Regular Maintenance Tips for Coastal Homes

Maintaining a Cape Cod home, especially in coastal areas, requires attention to specific challenges such as saltwater corrosion and moisture management. Regular inspections of roofs, siding, and exterior paint will identify early signs of wear. Cleaning gutters and ensuring proper drainage can prevent water damage. Additionally, seasonal applications of protective coatings can extend the life of exterior components.

Seasonal Preparations for Cape Cod Homes

Seasonal changes can impact your Cape Cod home differently, making preparations crucial. In winter, protecting pipes from freezing, inspecting heating systems, and ensuring insulation is intact will prevent costly issues. Spring may involve deep cleaning, checking for signs of water intrusion, and preparing outdoor space for use.

Choosing Sustainable Materials for Longevity

Utilizing sustainable and resilient materials during maintenance and renovation can enhance the durability of your home. Options such as composite decking, sustainably sourced wood, and eco-friendly paints not only minimize your environmental footprint but can lead to longer-lasting results and lower maintenance needs.

FAQs

What are Cape Cod homes known for?

Cape Cod homes are known for their simple, functional design featuring steep roofs, dormer windows, and coastal siding, ideal for New England living.

How do I expand a Cape Cod home?

Expanding a Cape Cod home typically involves designing an addition that complements existing features, often including an attached garage or new living space.

What are the benefits of an attached garage?

An attached garage enhances convenience, boosts security, and can elevate the overall appearance of a Cape Cod home when integrated well.

What materials are best for Cape Cod home exteriors?

Traditional materials such as wood, cedar shingles, and painted clapboard are ideal for Cape Cod homes, providing both durability and aesthetic charm.

How can I improve the energy efficiency of my Cape Cod home?

Enhancing energy efficiency may involve installing energy-efficient windows, improving insulation, and using sustainable materials during renovations.

Posted on

Master the All-in-One Pergola Configurator for Maximum Sales in 2026

Interactive family gathering under a stunning pergola, showcasing the All-in-One pergola Configurator in action.

Understanding the All-in-One Pergola Configurator

As outdoor living spaces evolve, the demand for customizable structures such as pergolas, verandas, and garden rooms has surged. The All-in-One pergola Configurator provides a robust platform that caters to this growing demand by enabling both manufacturers and retailers to efficiently configure, price, and deliver these complex products. By integrating various functionalities into one streamlined system, businesses can enhance customer experiences and boost sales.

What is an All-in-One Pergola Configurator?

An All-in-One Pergola Configurator is a sophisticated software tool that allows users to create customized configurations of pergolas in real-time. By leveraging 3D visualization technology, this platform enables customers to view their design choices live, adjusting elements such as dimensions, colors, and materials on-the-fly. This not only provides an engaging user experience but also significantly reduces the risk of errors during the ordering process.

Benefits of Using a Configurator in Sales

  • Enhanced Customer Engagement: The configurator allows customers to interactively design their pergolas, fostering a deeper connection with the product.
  • Increased Conversion Rates: By visualizing the finished product before purchase, customers are more likely to commit to a sale.
  • Efficiency in Operations: Automated processes within the configurator streamline quoting, project management, and customer follow-up.
  • Data-Driven Insights: The platform tracks customer preferences and behavior, providing valuable analytics that can inform marketing strategies.

Key Features to Look For

When selecting an All-in-One Pergola Configurator, consider the following key features:

  • 3D Visualization: Ensure the configurator offers high-quality 3D rendering for accurate representation of designs.
  • Real-Time Pricing: Look for instant pricing capabilities that provide accurate quotes as configurations are adjusted.
  • Customer Relationship Management (CRM) Integration: A built-in CRM system allows for seamless tracking of customer interactions and project management.
  • Customization Options: The configurator should support various design elements, including different roof types, colors, and accessories.

Seamless Customer Engagement Strategies

Engaging customers effectively is crucial for converting inquiries into sales. Utilizing advanced features of an All-in-One Pergola Configurator can transform the sales process and boost customer satisfaction.

Utilizing 3D Visualization for Customer Buy-in

3D visualization is a powerful tool for persuading customers. By allowing them to see exactly how their custom pergola will look in their chosen setting, businesses can significantly increase customer confidence. The interactive nature of the visualization means that customers can adjust their designs in real-time, making it easier to align their vision with your offerings.

Real-Time Configuration and Quoting Advantages

The capability to generate quotes in real-time during the configuration process ensures that customers receive immediate pricing information, thereby reducing the chances of dissatisfaction later on. This immediate feedback loop helps in addressing customer concerns promptly and serves to build trust throughout the sales journey.

Integrating Customer Feedback into Configurations

Customer feedback is essential for improving product offerings. Utilizing features that capture customer preferences during the configuration process allows businesses to adjust their products accordingly. This iterative approach not only enhances the configurator’s effectiveness but also aligns production with actual customer demands.

Driving Sales through Effective Project Management

Managing the entire project lifecycle from lead generation to installation is paramount for maximizing sales and efficiency. An All-in-One Pergola Configurator streamlines this process, ensuring nothing falls through the cracks.

From Lead Generation to Installation

Effective project management integrates all aspects of customer interaction from the first inquiry to final installation. Configurix enables businesses to track leads via embedded forms on their websites, ensuring high-intent leads are captured during the configuration process. Once a lead is generated, the configurator facilitates seamless transitions between stages of the sales cycle, keeping the project on track.

Setting Up Automated Follow-Up Processes

To maintain engagement, automated follow-up processes can be established. The configurator can automatically send reminders and updates to customers, enhancing communication and ensuring that no lead goes cold. Such automation reduces manual workload and allows sales teams to focus on high-priority tasks.

Tracking Performance Metrics for Continuous Improvement

Analyzing performance metrics is essential for understanding sales trends and customer behaviors. The configurator offers tools for monitoring these metrics, enabling businesses to make informed decisions based on solid data. By continuously refining their approach, companies can improve customer satisfaction and drive higher conversion rates.

Case Studies of Successful Implementations

Real-world examples illustrate the effectiveness of the All-in-One Pergola Configurator in transforming sales practices across industries.

Success Stories from 2000+ Companies

With over 2,000 companies utilizing the configurator daily, numerous success stories abound. Businesses report increased efficiency, higher customer engagement rates, and greater sales growth. These testimonials highlight how simplifying the sales process through 3D configurators leads to improved results.

Analyzing Different Use Cases Across Industries

The versatility of the configurator allows for its use in various contexts, from small-scale custom builders to large manufacturers. Each industry benefits uniquely, demonstrating the adaptability of the platform.

Lessons Learned and Best Practices

Through analysis, several best practices emerge, including the importance of user testing, responsive customer service, and ongoing training for sales teams. These factors contribute to maximized efficiency and increased customer satisfaction.

Future Trends in Pergola Configuration Technology

As technology continues to evolve, the future of pergola configuration looks promising.

Emerging Technologies Impacting Customization

Future advancements will likely include augmented reality (AR) capabilities that allow customers to visualize their pergolas in their own outdoor spaces through their devices. Such enhancements will provide even more interactive experiences, solidifying customer trust and increasing conversion rates.

Predictions for Customer Behavior in 2026

As consumers become increasingly tech-savvy, expectations for customization and interactivity in purchasing decisions will rise. Customers will seek out platforms that offer personalized experiences and efficient communication, pushing businesses to innovate their sales practices continuously.

Preparing for the Next Evolution of Configurators

To remain competitive, companies must stay ahead of technological trends and customer expectations. This involves investing in advanced features, maintaining a user-friendly interface, and ensuring seamless integration with other business systems to enhance overall customer experience.

Posted on

Elegant Home and Garden Ideas for Inspired Living Spaces

Home and Garden

Essential Home Maintenance Tips

Homeownership comes with its fair share of responsibilities, and regular maintenance is crucial to ensure your home remains a safe, functional, and welcoming space. From seasonal tasks to knowing how to tackle common repairs, being proactive can save homeowners time and money in the long run. Below are essential home maintenance tips that every homeowner should consider.

Seasonal Home Maintenance Checklist

Maintaining your home is an ongoing process that can differ significantly from season to season. By creating a seasonal maintenance checklist, you can stay on top of necessary tasks and avoid more significant repairs down the line. Here’s a breakdown of essential tasks for each season:

  • Spring:
    • Inspect the roof for any damage and clean gutters to prevent water damage.
    • Check for signs of pests and treat your home accordingly.
    • Service your HVAC system to ensure it’s ready for warmer months.
  • Summer:
    • Inspect and clean outdoor furniture and grills.
    • Check the irrigation system and adjust for watering needs.
    • Inspect decks and patios for wear and perform necessary repairs.
  • Fall:
    • Clean gutters and downspouts to prepare for winter.
    • Check windows and doors for any drafts and weatherproof as needed.
    • Inspect and service your heating system in preparation for colder weather.
  • Winter:
    • Inspect insulation in attics and basements to ensure energy efficiency.
    • Check for ice dams on your roof and remove snow buildup.
    • Test smoke and carbon monoxide detectors.

Common Repairs Every Homeowner Should Know

Understanding how to handle common repairs can empower homeowners and save on repair costs. Here are several essential repairs you should be familiar with:

  • Fixing Leaky Faucets: Most leaks can be fixed by replacing washers or O-rings. Start by turning off the water supply, disassembling the faucet, and replacing the worn parts.
  • Patch Small Holes in Walls: Use spackling paste for small holes. Apply it with a putty knife, let it dry, and then sand it smooth before repainting.
  • Unclogging Drains: A plunger can often clear minor clogs. For more stubborn blockages, a plumbing snake or a mixture of baking soda and vinegar can be effective.
  • Replacing Light Fixtures: Always turn off the power before replacing fixtures. Unscrew the old fixture and follow the manufacturer’s instructions for installation.

Tools Every Homeowner Should Have in Their Toolkit

Having the right tools on hand can make home repairs and maintenance much simpler. Here’s a list of essential tools every homeowner should have:

  • Basic Hand Tools: A hammer, screwdriver set, pliers, and adjustable wrench are essential for most repairs.
  • Measuring Tools: A tape measure and level are crucial for accurate measurements and ensuring items are hung straight.
  • Power Tools: A cordless drill and circular saw can expedite many projects, from assembling furniture to building shelves.
  • Safety Gear: Always wear safety goggles and gloves when performing repairs to protect against injuries.

Gardening Basics for Beginners

Gardening can be an incredibly rewarding hobby, providing not just beautiful landscapes but also fresh produce and herbs. For beginners, understanding the basics is crucial for a successful gardening experience. Here are fundamental principles every novice gardener should know.

Choosing the Right Plants for Your Climate

Understanding your local climate is essential in selecting plants that will thrive in your garden. Here are some tips for choosing the right plants:

  • Know Your USDA Plant Hardiness Zone: This zone indicates which plants are likely to survive and thrive in your area based on average winter temperatures.
  • Consider Sunlight Requirements: Some plants require full sun, while others thrive in partial shade. Assess the sunlight availability in your garden before selecting plants.
  • Native Plants: Consider incorporating native plants, as they are adapted to your local climate, require less maintenance, and support local wildlife.

Soil Preparation and Fertilization Techniques

Soil health is fundamental to successful gardening. Here are steps to prepare your soil and fertilize effectively:

  1. Test Your Soil: Use a soil testing kit to determine pH levels and nutrient content. This will guide your amendments.
  2. Amend Your Soil: Based on test results, add organic matter such as compost to improve soil structure and fertility.
  3. Fertilization: Use slow-release fertilizers or organic options like fish emulsion to nourish your plants throughout the growing season.

Watering and Irrigation Best Practices

Proper watering is crucial for plant health. Here are best practices to ensure your garden receives adequate moisture:

  • Deep Watering: Water deeply but less frequently to encourage deep root growth. Aim for about 1 inch of water per week, depending on rainfall.
  • Morning Watering: Watering in the morning minimizes evaporation and fungal diseases, allowing plants to absorb moisture effectively.
  • Drip Irrigation: Consider installing drip irrigation systems for efficient water delivery directly to the plant roots, conserving water and reducing weed growth.

Interior Design and Decor Strategies

Creating a beautiful and functional home involves thoughtful interior design and decor. Here are strategies to enhance your living space.

Color Theory: Choosing the Right Palette for Your Home

Color plays a pivotal role in setting the mood of a room. Understanding color theory can help you choose the right palette:

  • Warm Colors: Reds, oranges, and yellows create an energetic atmosphere and are suitable for social spaces.
  • Cool Colors: Blues, greens, and purples promote tranquility, making them ideal for bedrooms and relaxation areas.
  • Neutral Colors: Whites, grays, and browns serve as a versatile background, allowing you to incorporate accents and textures.

Maximizing Space: Furniture Arrangement Tips

Effective furniture arrangement can enhance both functionality and aesthetics in your home:

  • Define Areas: Use rugs to define different areas within an open space, creating a sense of order.
  • Flow and Accessibility: Ensure furniture placement allows for easy movement throughout the space. Aim for at least 18 inches of walking space between pieces.
  • Scale and Proportion: Choose furniture that fits the scale of the room. Overly large furniture can make a space feel cramped.

Incorporating Personal Touches in Home Decor

Your home should reflect your personality and style. Here are ways to incorporate personal touches:

  • Artwork: Display personal photography or artwork that resonates with you and complements your decor style.
  • Sentimental Items: Incorporate heirlooms or gifts from loved ones to create a meaningful atmosphere.
  • Color Accents: Use throw pillows, blankets, or decor items in your chosen color palette to add character to your space.

Advanced Gardening Techniques

Once you’ve mastered the basics, you may want to explore advanced gardening techniques to enhance your gardening skills and yield. Here are some recommended practices:

Organic Gardening: Principles and Benefits

Organic gardening focuses on sustainable practices that enhance the health of the ecosystem. Here are principles and benefits:

  • No Synthetic Chemicals: Avoid synthetic fertilizers and pesticides, opting for natural alternatives to protect the environment and your health.
  • Biodiversity: Incorporate a variety of plants to foster a balanced ecosystem, which can help deter pests naturally.
  • Soil Health: Emphasize composting, crop rotation, and cover cropping to maintain soil vitality and fertility.

Companion Planting for Pest Management

Companion planting involves grouping plants that benefit each other, particularly in pest management:

  • Tomato and Basil: Basil can repel tomato hornworms while enhancing the flavor of tomatoes.
  • Marigolds: Planting marigolds can deter nematodes and attract beneficial insects.
  • Cabbage and Dill: Dill can attract beneficial wasps that prey on cabbage pests.

Creating a Sustainable Garden Ecosystem

Creating a sustainable garden ecosystem involves fostering a balanced environment that supports both plants and wildlife:

  • Plant Diversity: Incorporate a mix of flowers, shrubs, and trees to attract pollinators and beneficial insects.
  • Water Conservation: Utilize rain barrels to collect rainwater for irrigation, reducing reliance on municipal water systems.
  • Mulching: Apply organic mulch to conserve moisture in the soil, suppress weeds, and improve soil health as it decomposes.

Outdoor Living Spaces: Enhancing Your Garden

Outdoor living spaces can significantly extend your home’s usable area, providing a relaxing environment for gatherings and personal retreat. Here are tips for enhancing your garden space.

Designing Functional Outdoor Areas for Relaxation

Creating a functional outdoor area involves thoughtful planning and design:

  • Seating Arrangements: Choose comfortable, weather-resistant furniture to encourage relaxation and socialization.
  • Shade Solutions: Incorporate umbrellas, pergolas, or shade sails to provide respite from the sun.
  • Outdoor Rugs: Use outdoor rugs to delineate spaces and add warmth and comfort to your outdoor areas.

Incorporating Water Features and Lighting

Water features and lighting can enhance the ambiance of your outdoor space:

  • Fountains and Ponds: Water features can create a calming atmosphere while attracting wildlife such as birds and butterflies.
  • Outdoor Lighting: Use solar lights, string lights, or lanterns to create a cozy ambiance for evening gatherings.
  • Pathway Lighting: Illuminate pathways with low-voltage lighting to enhance safety and aesthetics.

Building a Sustainable Landscape with Native Plants

Incorporating native plants into your landscape design can promote biodiversity and sustainability:

  • Low Maintenance: Native plants are adapted to local conditions, requiring less water and maintenance than non-native species.
  • Wildlife Habitat: Native plants provide habitat and food for local wildlife, including birds, butterflies, and beneficial insects.
  • Soil Conservation: Native plants help prevent soil erosion and improve soil health through their root systems.